Building your first app with Kodular
Welcome to Kodular!
In this tutorial, you will learn to create your first app with Kodular.
If you have any queries or doubts, feel free reach out to us on the community.
The first steps
-
Navigate to Kodular Creator. You will be presented with a Login screen. Login to continue.
-
Then after that you will be taken to the Projects screen. A Project is nothing but an app.
-
Click on
+ New Projectbutton to create aProject. -
You can enter any name you want. In this tutorial, we will name the app
HelloKodular.
ClickNext. The project will be created and you will be taken to the Designer page of your project. -
For testing your app while developing, please see Live Development.
Tip
At this point, we recommend going through the Understanding Kodular page to get an overview of developing apps in Kodular.
The User Interface of Kodular Creator
First, let us walk thorough the Designer UI of Kodular Creator.

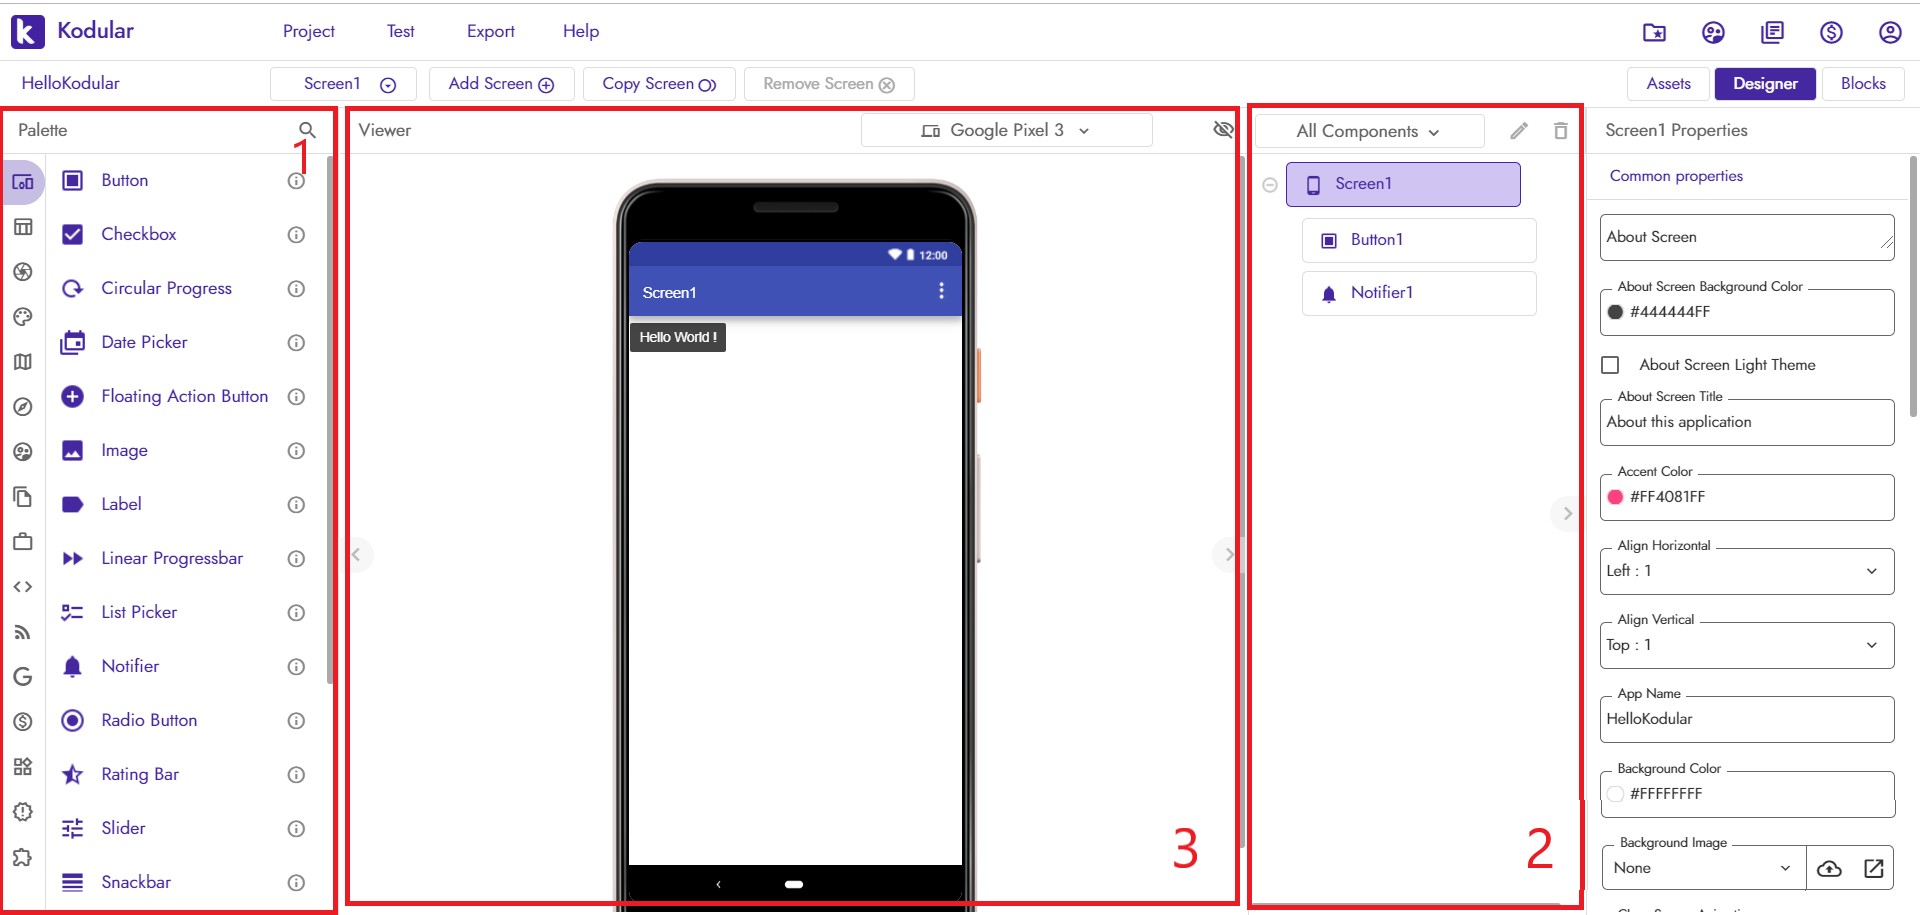
The above shown screen is called Designer.
From this page, you can add/delete Components and modify their properties.
-
On the left side of your page, numbered
1is the Components Palette or simply Palette . This consists of various components grouped under different categories.
When you need to add a component, you can click on the component on the Palette, hold it and drag it onto the Viewer area of the Designer page. -
On the right side, you have the Components Hierarchy and the Designer Properties Panel (which is visible when you select a component).
The Components Hierarchy shows the visible components added into the currentproject.
The Designer Properties Panel will be visible when clicking on a component and displays the properties of that component. -
In the middle is the Viewer which gives a mocked up view of the app as seen on
a real device. To add a component to theproject, drag the component from the Palette and drop it inside the Viewer.
Below the Viewer, the Non-visible Components Panel is present, which shows all the Non-Visible Components added to the currentproject. -
At the top of the page, various menus and options are present.
Building the app
Now that we are familiar with the interface, we can get to work and create a simple app, with a Button which shows the text "Hello World".
Step 1 Find the Button component from the Palette under the User Interface category. Click on it, and drag it onto the Viewer, while keeping the mouse button clicked down. This is how you add a component to the project.
Step 2 Now click on the Button1 displayed on the Components Hierarchy. By default, this is how the components are named, you can rename them if needed.
The Properties Panel for the Button should be visible now.
Step 3 Now, find the Text property in that panel and change that to Hello World!.
If you have connected your companion and testing using it, then now the change should be reflected on the device.
Step 4 Now, you can select Export menu from the top menubar to build your project into an APK, which can be installed in an Android device.
Step 5 Once the APK is built, the APK will either be downloaded onto your computer, or the barcode to the link will be shown based on the option you chose.
You can transfer the APK onto the Android device and you can install your own app on the device!
Yay!
That's it! You have successfully built your first app with Kodular.